

Need to automate repetitive taps on your Android device? You're not alone. Android doesn't include native automation tools. Anyone running CPS tests, playing idle games, or handling repetitive app interactions needs a third-party solution.
The problem isn't finding an auto clicker for Android. It's finding one that actually works. Most apps either lack precision controls, require root access, or come loaded with intrusive ads that interrupt automation. Many users download multiple apps before finding one that meets basic requirements.
This guide covers everything you need to know about an Android Auto clicker. Learn what features separate functional auto clickers from frustrating ones. See how to set up MT Auto Clicker in under 2 minutes. Discover how to configure it for different use cases. By the end, you will understand exactly how to automate taps on Android without rooting your device or dealing with complicated coordinate systems.
What Makes a Good Android Auto Clicker
Android doesn’t have built in auto clicking tools. You need third-party apps to automate taps, which means choosing the right one matters.
The 5 Features That Actually Matter
1. Millisecond-Level Speed Control
Most basic auto clickers only offer “slow/medium/fast” settings. That’s useless. Quality auto clickers let you set exact timing, down to 1 millisecond precision. This means you can configure 50ms for rapid gaming clicks or 2000ms for slower automated tasks. Many popular auto clickers don’t offer this level of control.
2. Easy Tap Position Setup
You should tap where you want clicks to happen, not manually enter coordinates. Look for apps that record visual positions and provide a clear preview of where clicks will land.
3. Multi-Point Clicking
Need to tap multiple locations in sequence? Basic apps can’t do this. Better auto clickers let you create tap sequences, like tapping button A, waiting 3 seconds, then tapping button B.
4. Floating Controls
A small floating button that stays on screen while you use other apps. This lets you start/stop automation without constantly switching apps.
5. No Root Required
The best auto clickers work using Android’s Accessibility Services, no risky phone modifications needed. The app will ask for accessibility permission (this is how it simulates taps).
What to Avoid
- Apps requiring excessive permissions (camera, contacts, location)
- Auto clickers that haven’t been updated in over a year
- Tools with intrusive ads during automation
- Apps that drain battery heavily (check reviews)
One tool that checks all these boxes is MT Auto Clicker, it offers 1ms precision, multi-point tapping, works without root, and is entirely free.
Let’s set it up.
MT Auto Clicker Android: Download & Setup
Installing and configuring this Android auto clicker takes about 2 minutes. Here's the complete process.
Download and Install
- Open the Google Play Store on your Android device
- Search for "MT Auto Clicker"
- Tap Install (completely free, no in-app purchases)
- Wait for the installation to complete
- Google Play automatically scans for viruses during installation.
Enable Required Permissions
MT Auto Clicker needs one critical permission to work:
Display Over Other Apps Permission:
- Tap Open after installation.
- A pop-up appears: "Display over apps - Please enable the feature to use the app."
- Tap OK
- You're taken to Settings → "Display over other apps."
- Find MT Auto Clicker in the list.
- Toggle the switch to ON.
- Tap the back button to return to the app.
Why this permission? It allows MT Auto Clicker to show floating controls on top of other apps, so you can start/stop automation while using games or websites.
Understanding the Interface
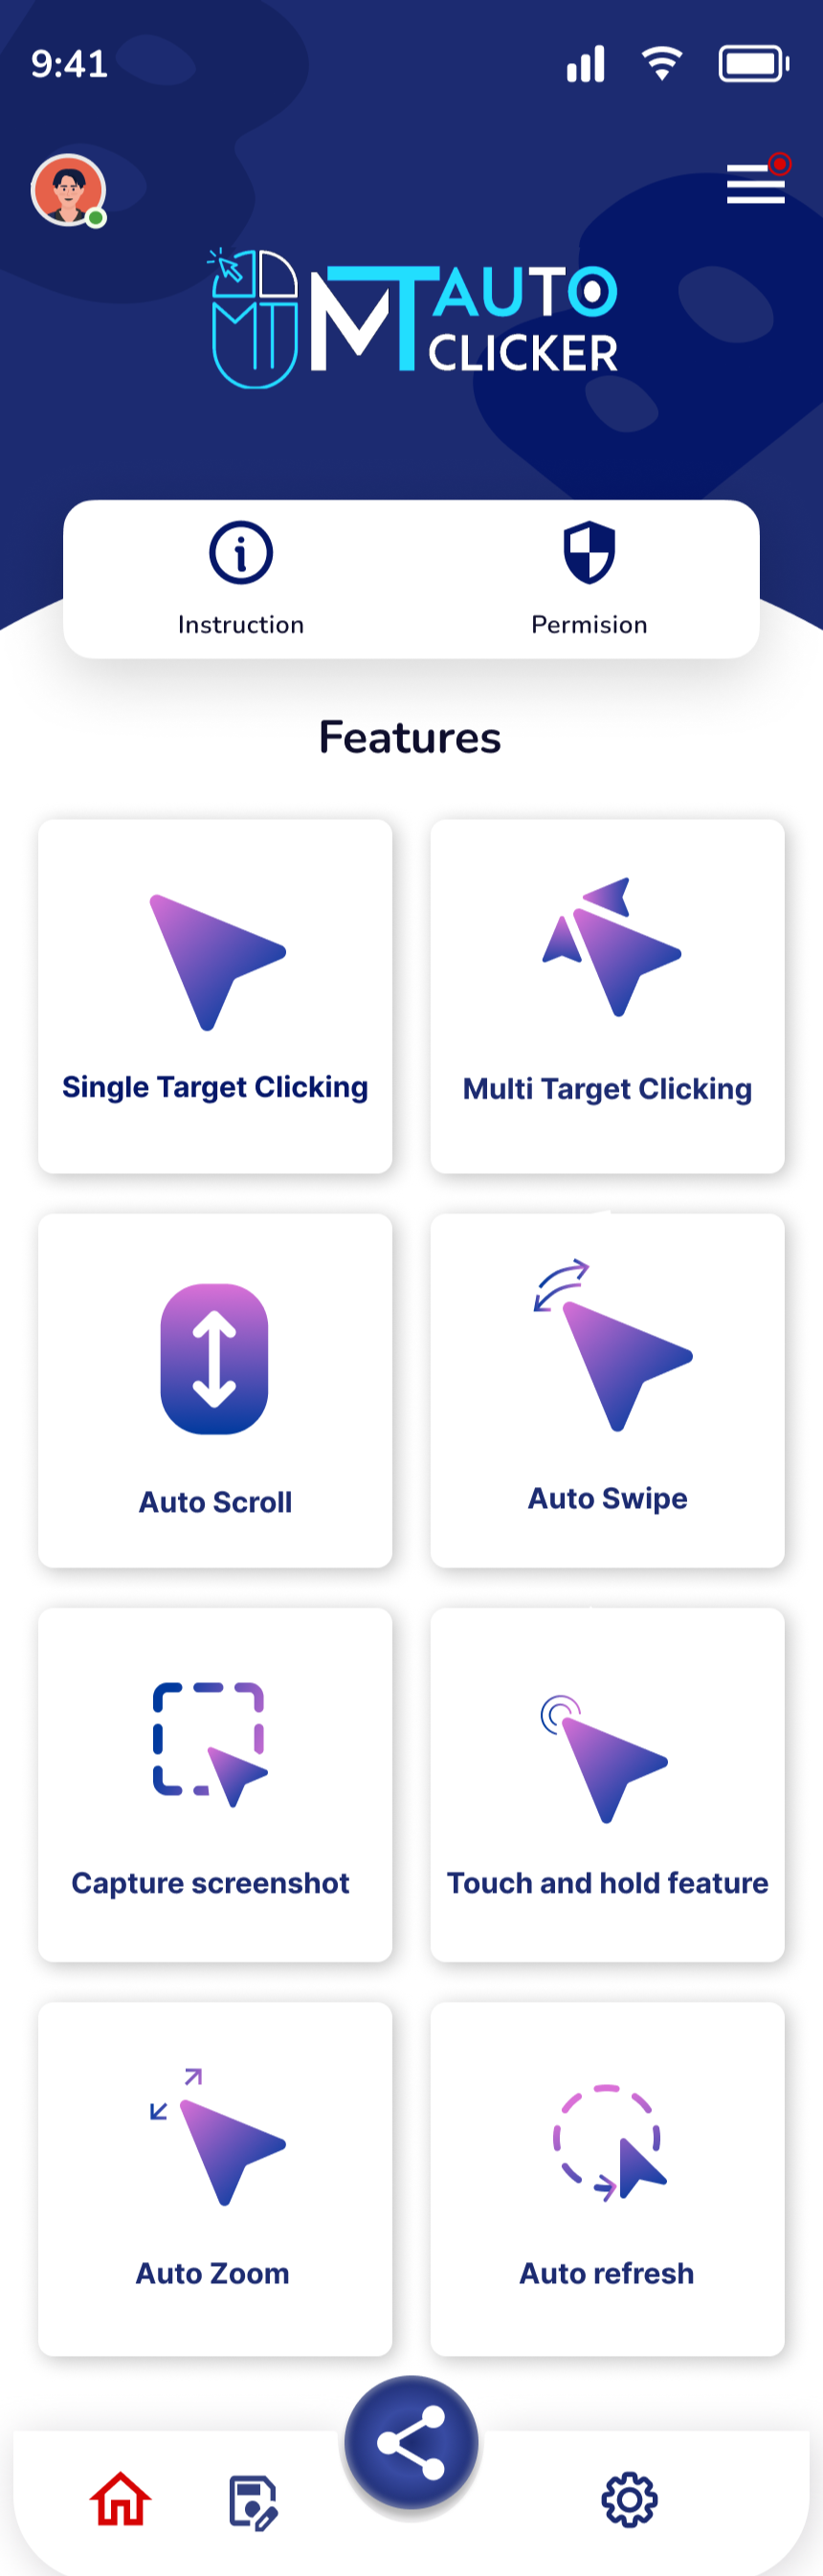
Once setup is complete, you'll see the main screen with seven automation features:
Available Features:
- Single Target Clicking - Repeatedly click one spot
- Multi Target Clicking - Click multiple positions in sequence.
- Auto Swipe - Automate swipe gestures
- Auto Scroll - Automatic page scrolling
- Pinch to Zoom - Automate zoom in/out gestures.
- Touch and Hold - Long-press automation
- Capture Screenshot - Automated screenshot capture
Navigation:
- Home tab - Main features (where you are now)
- Presets tab - Save and load configurations
- Settings tab - App preferences
At the top right, there's a menu icon (three horizontal lines) for additional options.
The MT Control Bar
When you start using any feature, a vertical floating panel appears on your screen with these icons:
- MT logo icon - Tap to collapse the control bar into a compact button
- Target/Pointer icon - Set where clicks will happen on screen
- Eye icon - Toggle visibility of click position markers (blue circles)
- Play button - Start the automation
- Save icon - Save your current configuration as a preset
- X button - Close the floating panel
This panel can be dragged anywhere on your screen and stays visible even when you switch to other apps.
Setup complete! MT Auto Clicker is now ready to use. Next, let's see how to use it with a real example.
How to Use MT Auto Clicker
MT Auto Clicker works by setting two main configurations: Event Timing and Time Interval.
Understanding the Configuration Options
When you tap any feature (like Single Target Clicking), you'll see a configuration screen with these settings:
Event Timing:
- Never Stop - Runs continuously until you manually stop it
- Set Duration - Enter a specific time (e.g., "5") and select unit from dropdown (Seconds or Minutes)
- Number of Cycles - How many times to repeat the automation sequence
Time Interval/Delay:
- Enter your desired interval number (e.g., 50)
- Select the time unit from the dropdown: Milliseconds, Seconds, or Minutes
- For fast clicking: 50 Milliseconds = 20 clicks per second
- For moderate clicking: 100-200 Milliseconds = 5-10 clicks per second
- For slower tasks: 500-1000 Milliseconds = 1-2 clicks per second
Important: Always select the correct unit from the dropdown. Choosing Milliseconds instead of Seconds makes a massive difference in speed.
Once configured, tap the red "Click stop" button to activate the feature and get the floating control panel.
Now let's see this mobile auto clicker in action with a real example.
Click Per Second Test Example
Let's configure this auto clicker app to automatically click on a CPS test website.
Configuration:
- Event Timing: 5 Seconds
- Time Interval: 50
- Unit: Milliseconds
Steps:
- From the MT Auto Clicker home, tap Single Target Clicking
- Set Event Timing to 5 Seconds
- Set Time Interval to 50 Milliseconds

- Tap the red "Click stop" button
The floating control panel now appears with these icons:
- MT logo icon (top)
- Target/Pointer icon
- Eye icon
- Play button
- Save icon
- X button (bottom)
- Open your browser and go to Click Speed Test
- You'll see a blue circular marker on your screen
- Click and drag this marker to position it on the "CLICK HERE TO START" button
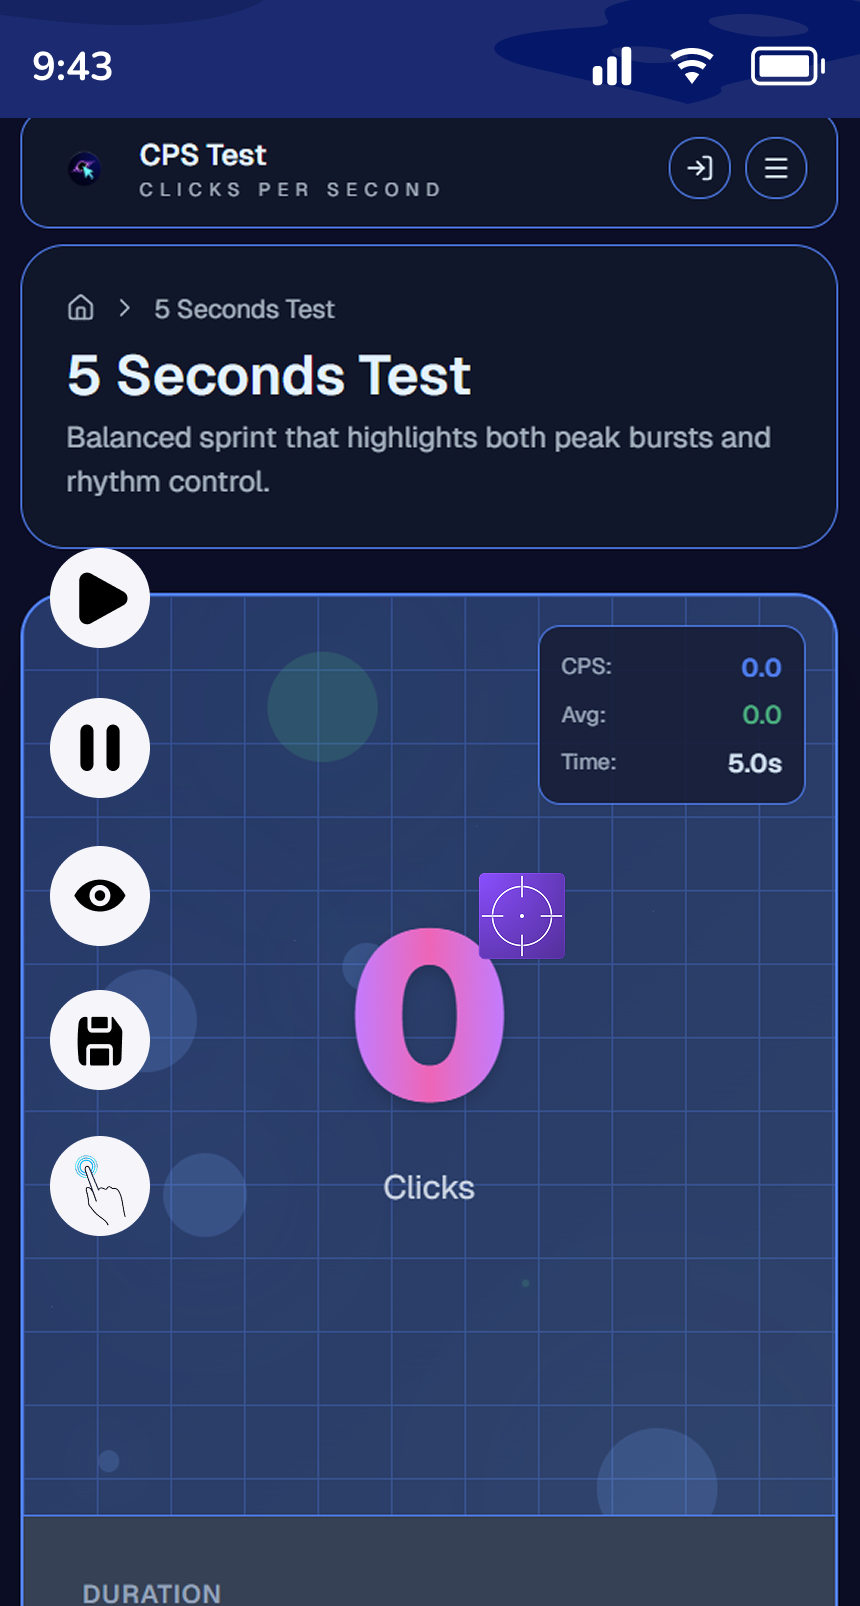
- Tap the Play button on the floating panel
- The auto clicker starts clicking every 50 milliseconds
- After 5 seconds, the test stops and shows your CPS score
Results: With 50ms intervals, you should achieve approximately 20 CPS (100 clicks in 5 seconds).
To stop or adjust:
- Tap the Play button to pause
- Drag the blue marker to reposition
- Tap Save icon to save this configuration
- Tap X button to close the control panel
This same process works for any app or game requiring repetitive tapping.
Best Settings and Usage Tips
Getting the most out of MT Auto Clicker means understanding its settings and choosing the right configurations for your tasks.
Customizing MT Auto Clicker Settings
Access settings by tapping the Settings icon at the bottom navigation bar, next to the Presets option.
Target Size
Controls how large the blue click marker appears on your screen.
- Range: 10, 11, 12, 13… up to 50
- Smaller size (10-20): Better for precise clicking on small buttons or tight spaces
- Medium size (25-35): Good balance for most tasks
- Larger size (40-50): Easier to see and position on bigger screens
When to adjust: If you’re clicking tiny UI elements in games, use size 10-15. For general use, 25-30 works well.
Target Transparency
Adjusts how see-through the click marker is so you can see what’s underneath.
- Options: 10, 20, 30, 40, 50
- Lower transparency (10-20): Marker is more visible, easier to spot
- Higher transparency (40-50): Marker is more see-through, better for precise positioning
- Hide completely: Tap the Eye icon in the control bar to toggle marker visibility.
Tip: Use 40-50 transparency when positioning over text or images you need to read.
Control Bar Size
Changes the floating control panel dimensions.
- Options: Small, Medium, Large
- Small: Minimal screen space, but smaller touch targets
- Medium: Balanced size for most users (recommended)
- Large: Easier to tap icons, especially on tablets or if you have larger fingers
Language Options
MT Auto Clicker supports 8 languages:
- English (default)
- Español (Spanish)
- Français (French)
- Deutsch (German)
- Indonesian
- Filipino
- Português (Portuguese)
- Русский (Russian)
Dark/Light Mode
Toggle between dark and light themes from the hamburger menu in the top-right corner. Dark mode reduces eye strain during extended use and saves battery on OLED screens.
Managing Presets
The Presets tab lets you save and reuse configurations.
How it works:
- Configure your timing and intervals in any feature.
- Tap the Save icon in the floating control bar.
- Your preset is saved and organized by feature type.
- Access all presets from the Presets tab on the home screen.
Organization: Presets are automatically grouped by feature:
- All Single Target presets together.
- All Multi Target presets together.
- All Auto Swipe presets together, etc.
Editing Presets:
- Tap any saved preset to load it.
- Make your changes
- Tap the Save icon again to update
- No need to rename or manually organize
With these settings and tips, you’re ready to use MT Auto Clicker effectively.
Is Android Auto Clicking Safe?
Yes, MT Auto Clicker is safe for your device. Here's what you need to know.
Device Safety
- No root required - Works with standard Android, no system modifications
- Uses Accessibility Services - Same framework as password managers and screen readers
- No malware - Verified and scanned by Google Play Store
- Minimal battery drain - Uses less power than most mobile games.
One rule: Keep intervals at 40ms or higher. Going below 40ms can cause crashes.
Privacy and Permissions
MT Auto Clicker only requests two permissions:
- Accessibility Service - To simulate taps
- Display Over Apps - To show floating controls
No data collection. No ad tracking. No internet required.
Bottom line: MT Auto Clicker is a legitimate, safe Android app from the Google Play Store.
Conclusion
Android auto clickers solve a real problem. Android lacks built-in automation tools. Users must rely on third-party apps for repetitive tapping tasks.
The key to choosing the right auto clicker comes down to three things. First, millisecond-level precision for accurate timing control. Second, visual positioning systems that let you drag and place click targets. Third, proper use of Android's Accessibility Services without requiring root access. Apps missing these features will limit what you can automate.
Setup and configuration matter just as much as app selection. Understanding the difference between milliseconds, seconds, and minutes prevents the most common user frustration. Properly positioning click targets and saving configurations as presets turns setup into a reusable tool.
Auto clickers work best within their technical limits. Keep intervals above 40-50ms to prevent device crashes. Adjust target size and transparency to improve accuracy. Organize presets by task type to save time.
With the right app and proper configuration, Android auto clickers handle testing, benchmarks, and repetitive workflows without manual intervention.